5 Tips for Choosing the Best Photo for Your Pet Portrait
You’re ready to reach out and commission an artist to paint your beloved animal! You have all the information you need, and then you get to the difficult part: which photo do you send?
Worry not! Based on my own personal experience painting over 100 animals, I’ve compiled a list to help give you some guidance and make the process as easy as possible!
1. Provide Multiple Photos
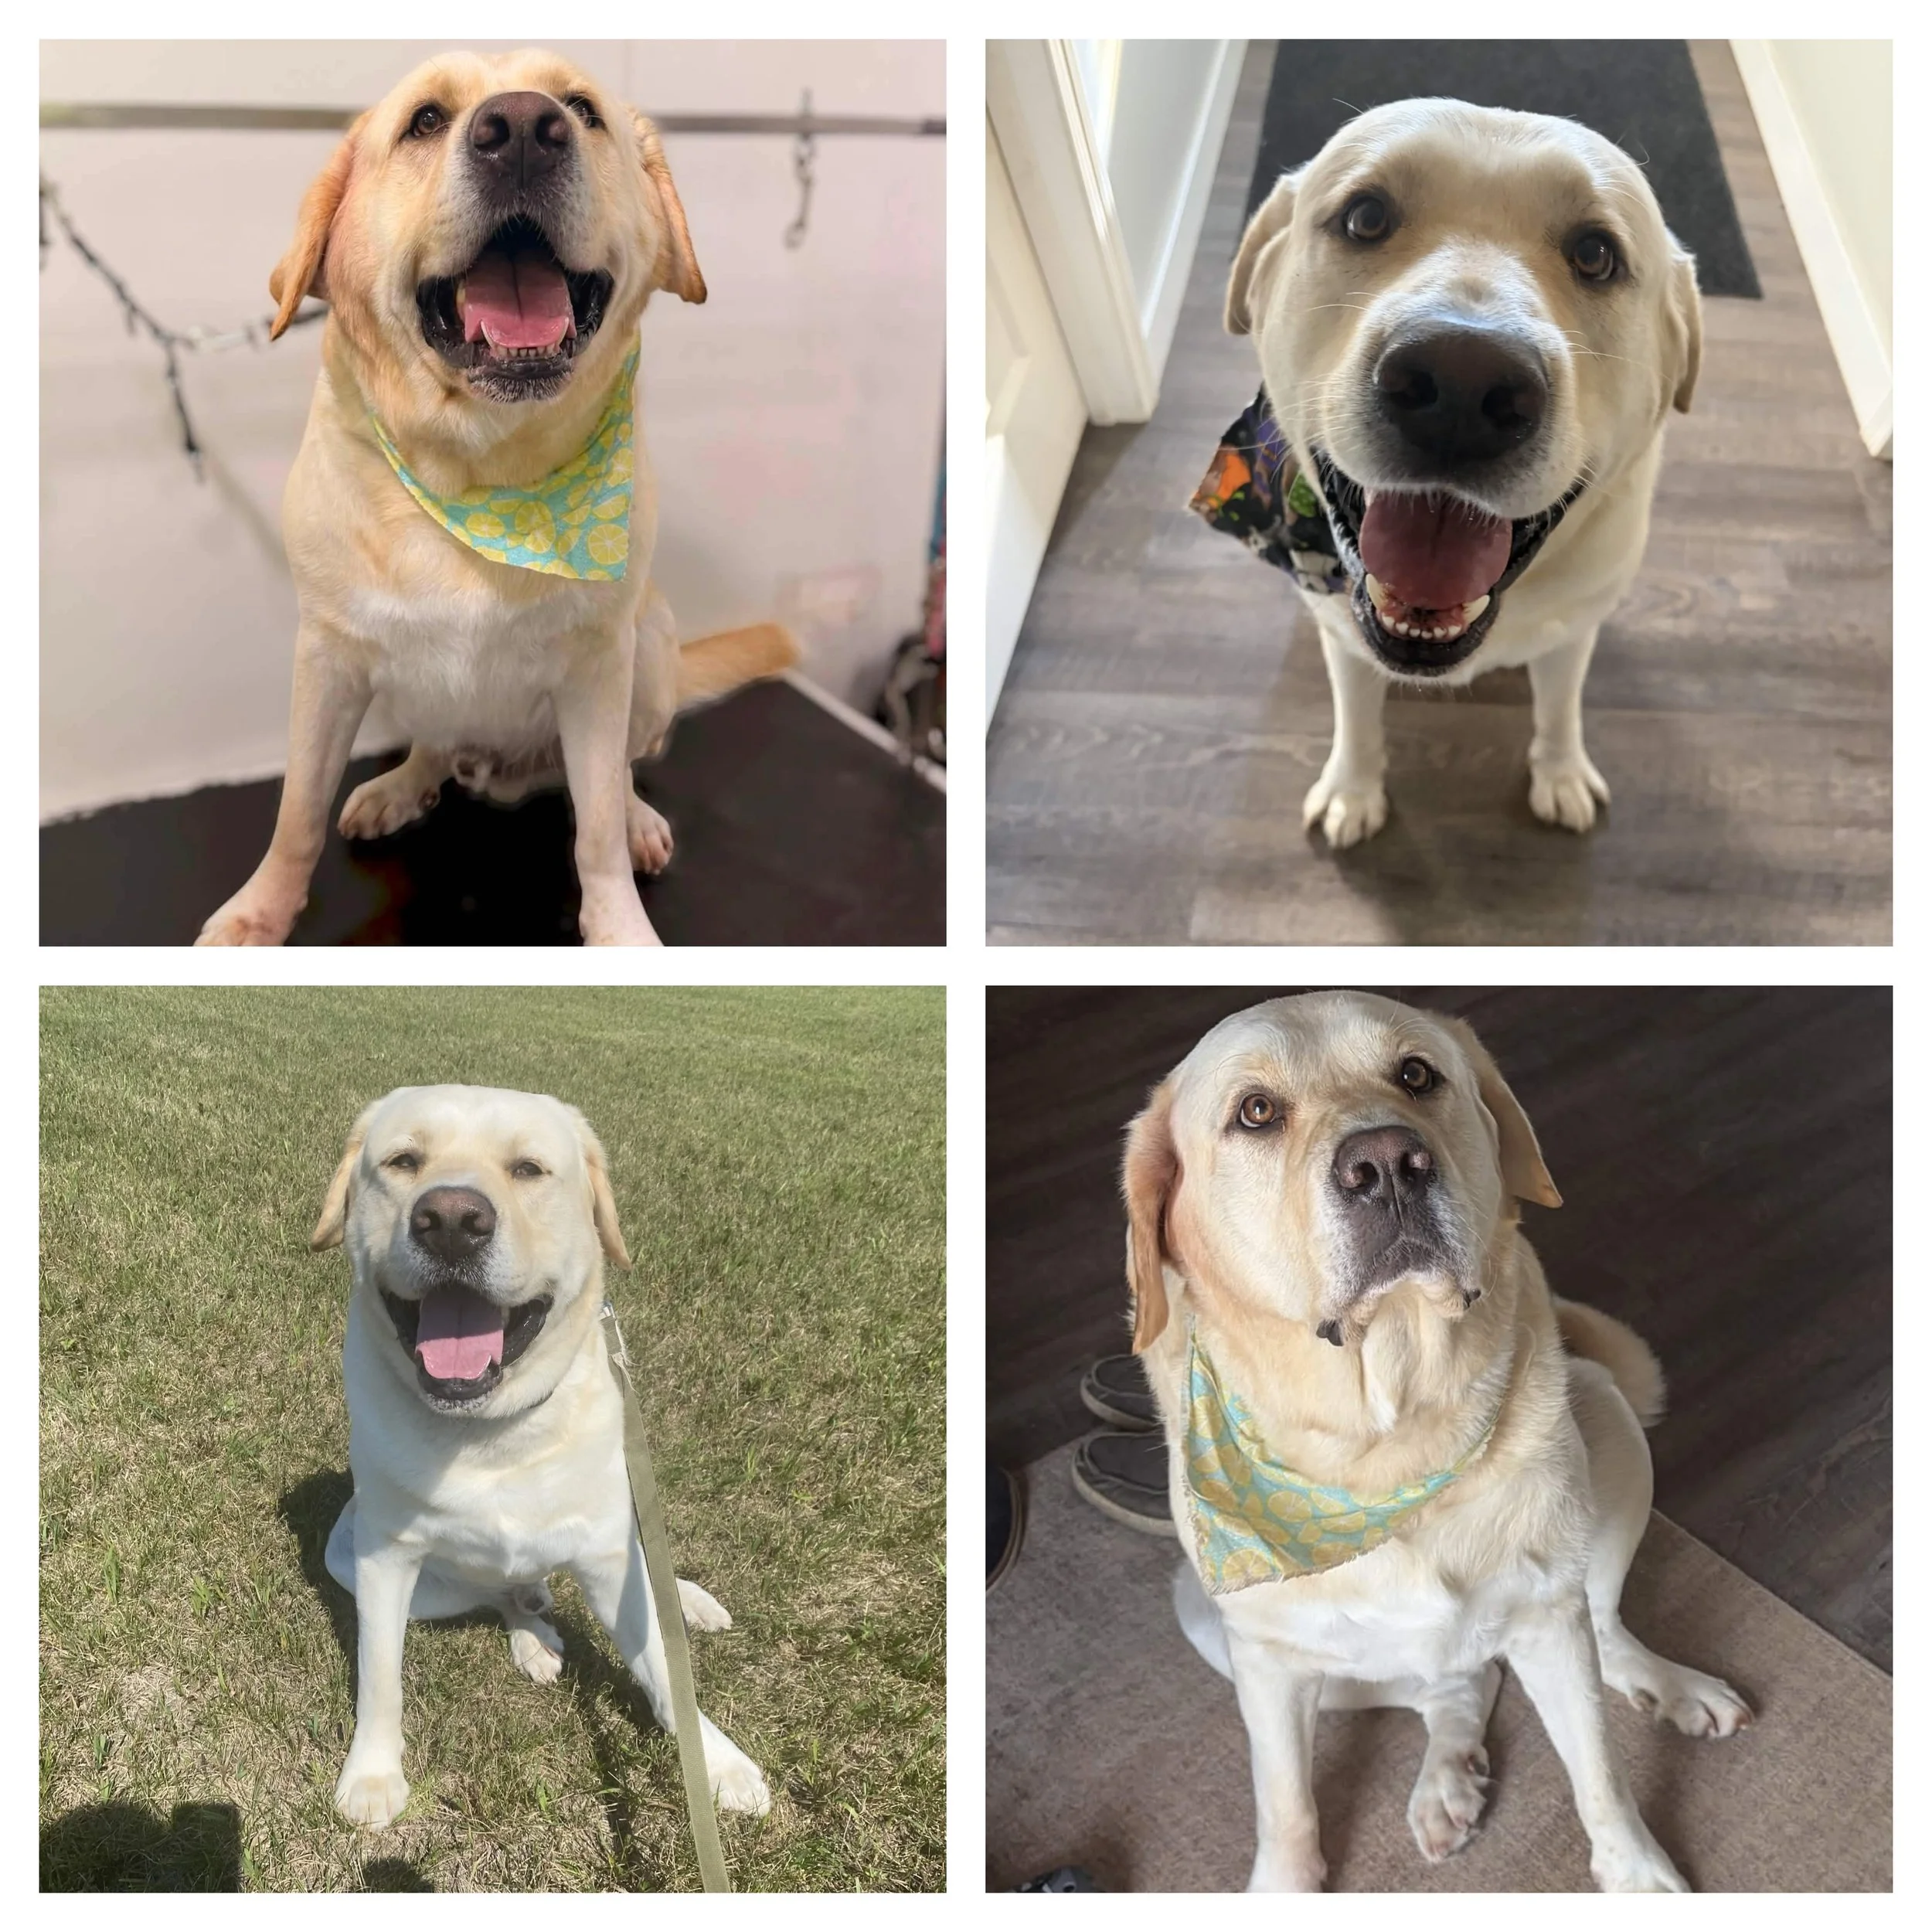
If you have a ton of photos that you think would work, then send them! Personally, I love seeing an animal’s cute face, and seeing multiple photos of them is just wonderful!
Giving your artist options can help save time when selecting the photo that will ultimately be used as the main reference. Additional photos can also be helpful for showing details that might not be visible in your favourite photo.
Having all these photos shows off an animal’s personality, and can provide additional information such as eye colour.
2. Good Lighting
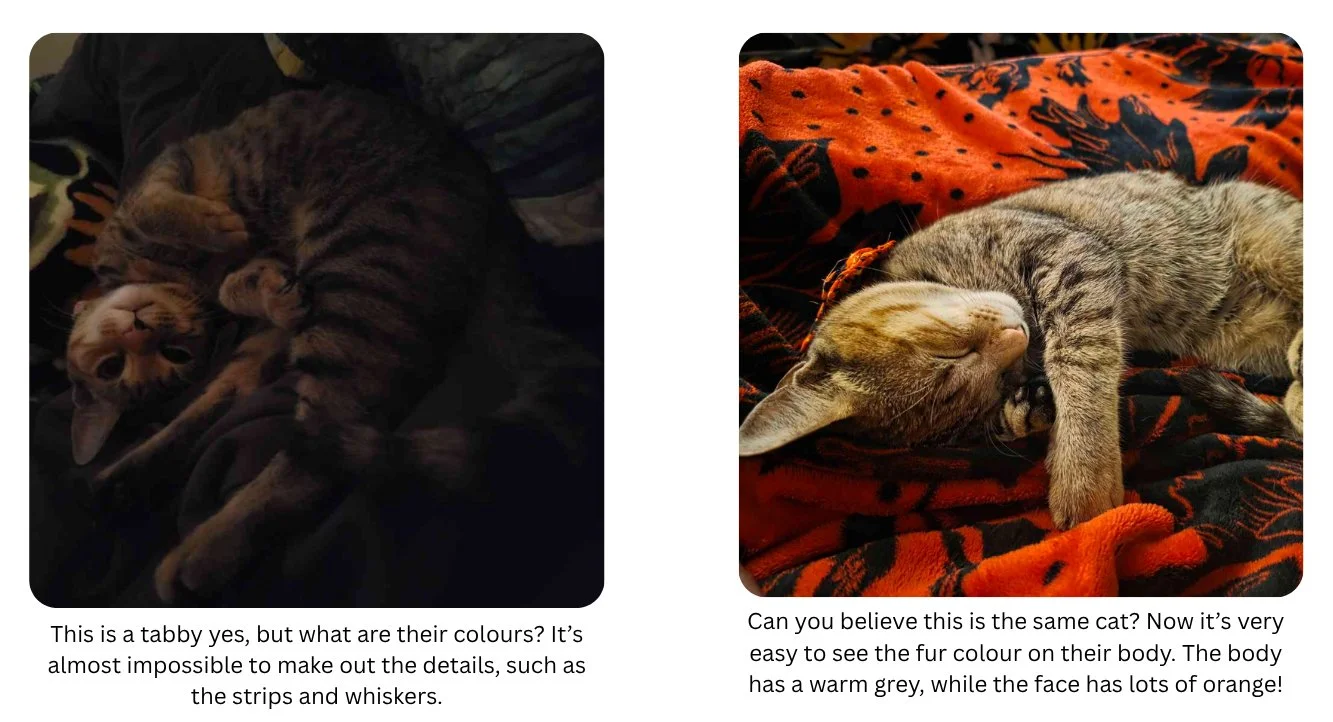
As much as I wish it were true, artists aren’t miracle workers. If you can’t see your pet in the photo, we can’t either!
While there are ways to try and lighten an image, these methods don’t work very well if the photo was taken in mostly darkness. If possible, try to select photos where your pet is well lit.
Natural lighting is usually best, such as an outdoor photo or one of your pet sitting near a window. Indoor lighting can work as well, and camera flash may be perfectly usable too. Your artist will be able to let you know whether or not they can work with the photos you provide!
3. Keep Your Pet in Frame
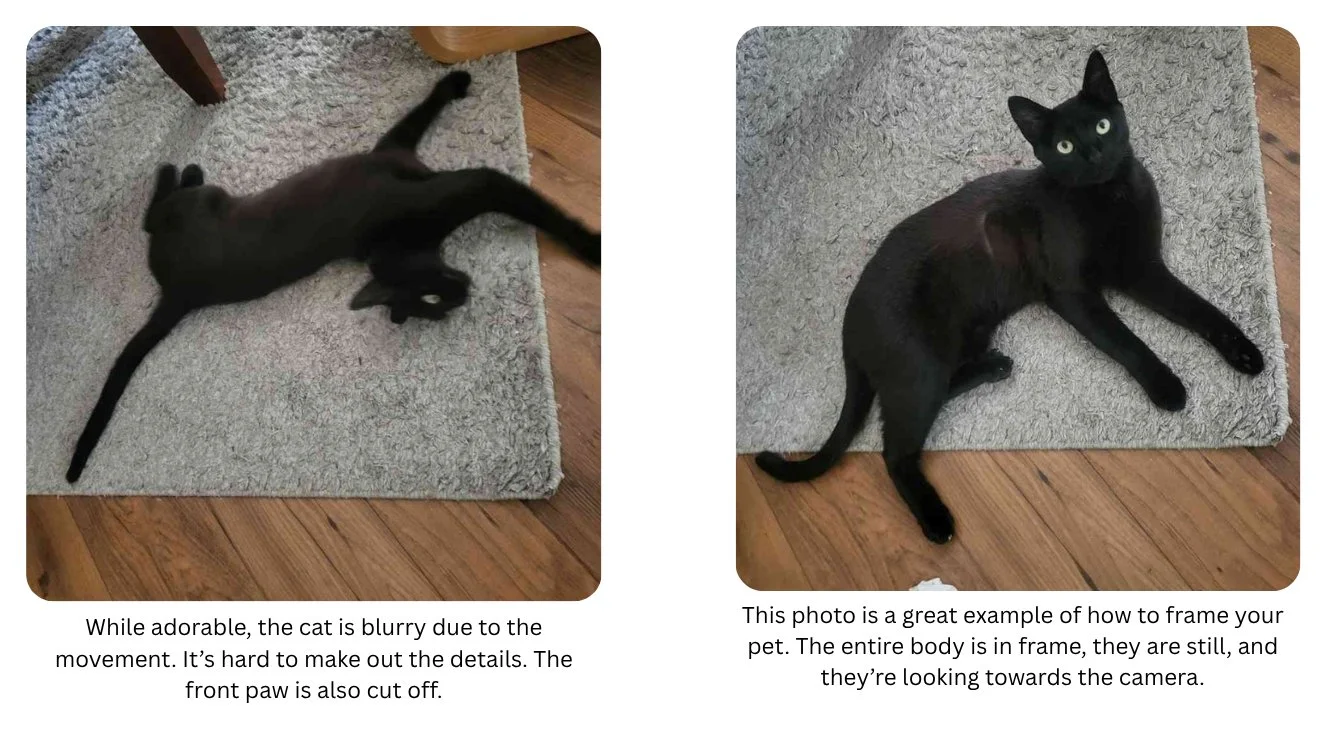
You’ve captured the cutest face, but to do so, your animal was in motion. While some artists could potentially fill in the gaps, having important details missing (such as their ears or tail) could result in an artist being unable to use the photo.
If you have a photo like this that you truly love, be sure to include additional photos that show the missing pieces. Every animal is unique, so you want to be sure your artist knows about that fluffy ear tip, unusual marking, or really cool fur pattern!
4. High-Quality Photos
This one can be tricky, especially if the animal is no longer with us. The higher the photo quality, the more details the artist can see in your reference photo.
We want to make sure your pet looks like your pet and not someone else’s, so please do your best to provide the best-quality photos you have available!
That said, don’t worry if your only photos aren’t perfect. If your pet has passed away or you only have older photos, send them anyway! Your artist may still be able to work with them, and they can let you know what is possible.
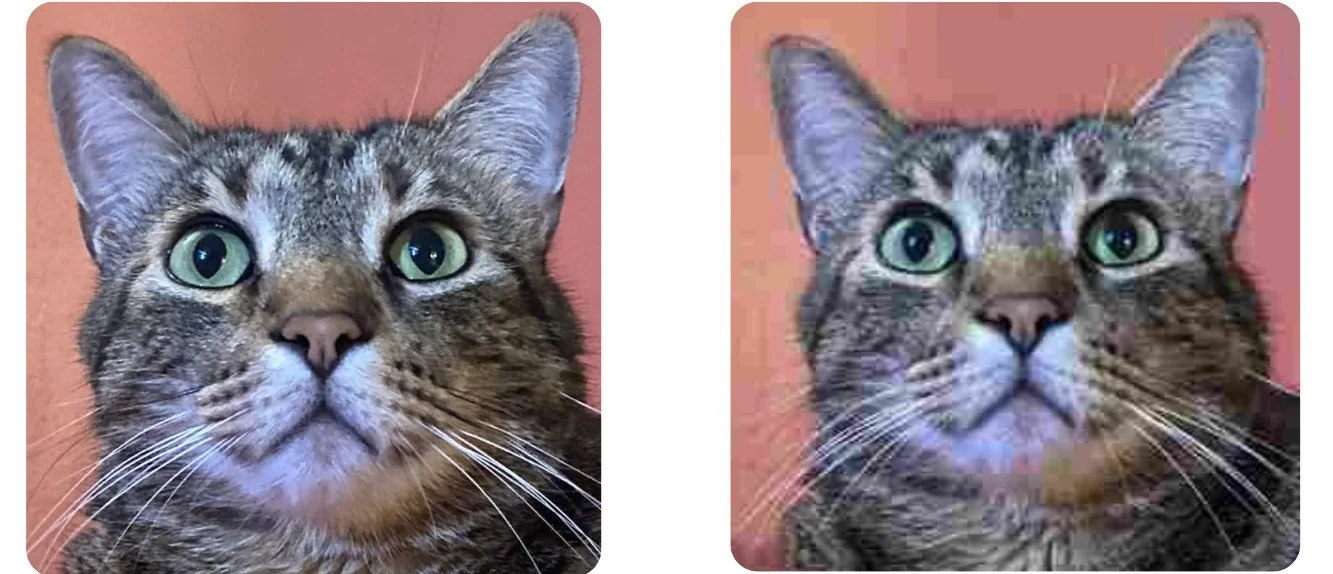
The image on the left is very clear with their details. The one on the right, however, is incredibly pixelated. Images like this make it difficult to see the finer details that make each pet unique.
5. No Accessories (Unless You Want Them in the Artwork)
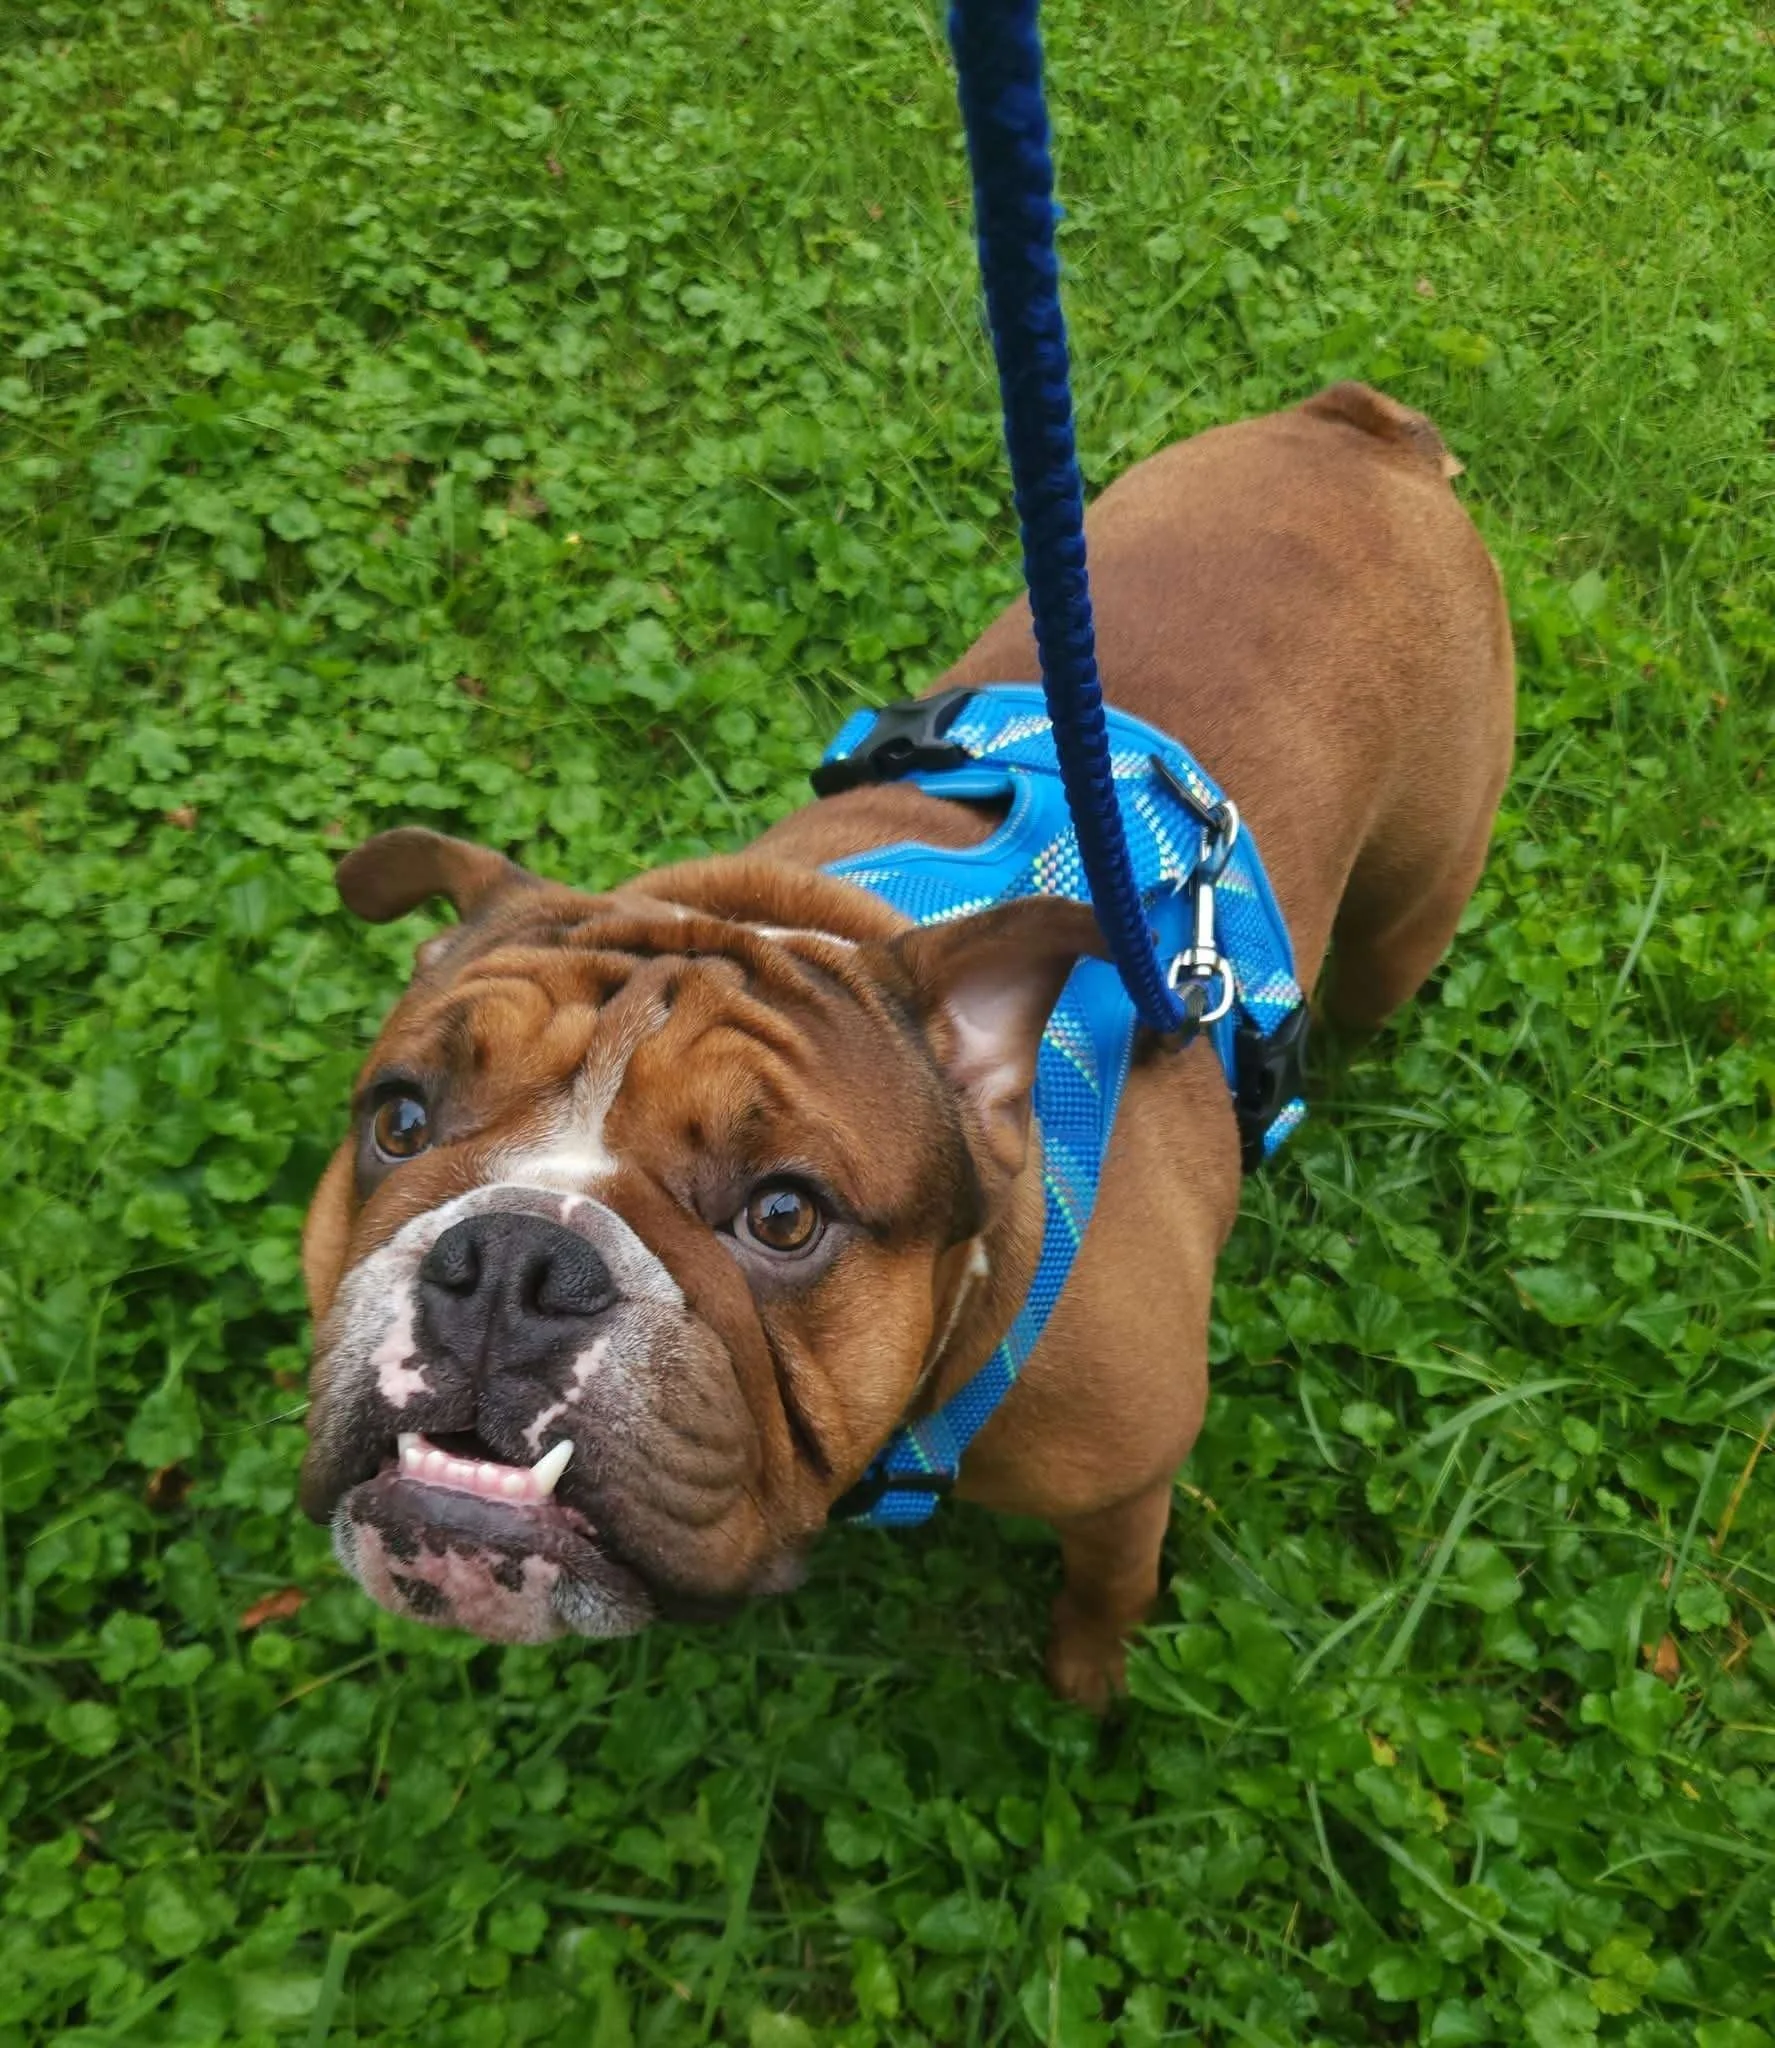
Personally, I have enough experience that I can recreate details that may be hidden underneath a collar or other accessories. However, ideally, try to provide clean photos of your beloved animal to make the process easier.
If you do choose to include extra details, be sure to either ask your artist or read their terms to see if this will incur a higher price. For myself, I do charge more for additional details, so it’s always best to double-check in advance so you aren’t surprised!
This is an example where I wouldn’t feel confident figuring out the details under the harness.
I Hope This Helps!
At the end of the day, an artist wants to do their absolute best to create a work of art that truly feels fitting for your animal. By providing good reference photos, you can rest assured that you’ve given your artist the best possible starting point to bring your vision to life!
And if you’re ever unsure, simply ask your chosen artist what works best for them. Every artist has their own process, and they’ll be happy to let you know what they need to create the best portrait possible.
Special thanks to all the wonderful volunteers who provided excellent photos to demonstrate each point! They are as follows: Gus (@_gusthebusss_), Macchiato, Tiramisu, Merlin, and Sid.